Sunday, January 13, 2019

Snow Theme

Welcome back! Over the last two weeks, Sweet E and I did a number of activities for our snow theme. Take a look!

~ ~ ~ ~ ~ ~ ~ ~ ~ ~

Sticky Paper Snowman
I bought a brand new roll of con-tact paper for this round of tot school, and here is the first thing we did with it. I drew a simple snowman shape on the paper, tore off the backing, and taped it to the wall sticky-side out. Then I supplied Sweet E with cotton balls, so she could place them up there. 


She enjoyed this activity, and this is about as far as she got.


But then Little M&M got home and helped her finish it up! LOL. He still loves activities!


Snowflake Tape Resist Painting
I remember this being one of Honey Pot's very first tot school activities too! I placed some strips of masking tape down onto cardstock, resembling a snowflake, and provided Sweet E with a foam paintbrush and some paint. She first explored her paintbrush...


Then she started painting freely!


After lunch we came back upstairs and pulled the masking tape up. There was her beautiful snowflake! We've hung it up on her wall, and she loves to point it out to us.


Faux Snow
I found a recipe online for squishy, moldable snow: 2 cups baking soda + 1/2 cup conditioner. So I made a double batch, and threw in an old Olaf toy. Then I provided her with a bowl and scoopers to play.


We made a few snowballs!


And squished them!


She loved getting messy!


Then I pulled out a small shovel from the big kids' bin of kinetic sand accessories. She enjoyed this new way to play!


Pom Pom Push
I had seen this all around Pinterest, usually with a plastic container or larger box. But this was an impromptu activity, so I just grabbed what was in front of me. I showed her how to push the pom poms through the holes. The color matching was a bit advanced for her though!


Sticker Snowballs
Sweet E woke up grumpy from a too-short nap one day, so I grabbed the first thing I thought of to help keep her happy. Blue paper + some white circle stickers = a simple snowy scene.


It worked! She kept busy for a little while with this. And it brought her out of her post-nap funk!


Snowy Stamps
This has become one of Sweet E's favorite activities! I supplied her with a piece of paper and all of the snowy stamps we had. She LOVED stamping!


At first, she was all over the place...standing on her chair:


Then she climbed up onto the sofa and bent over to stamp some more:


Then she climbed onto the craft table to stamp again:


And what added to the fun of it all, was placing all the caps back on.


Super fun! And this became my go-to throughout the week when I needed to grab a quick activity to entertain her. We have accumulated a ton of these stamps over the years, so it really keeps her busy!


Where's Olaf?
For this activity, I took our trusty Olaf toy and three cups. Then I let Sweet E see me place Olaf under a cup. First, I just asked her, "Where's Olaf?" And when I saw that she understood the game just fine, I began to move the cups around once or twice.


She doesn't talk much yet, but this gesture has long meant, "Where's ___?"


There he is! She loved this.


We kept Olaf and the three cups out, and Daddy and her big siblings love to play it with her once in a while!


Snowflake Molds - Activity #1 - Ice Cube Sensory Bin
I bought a pair of snowflake silicone molds, and wanted to be sure to get a lot of use out of them. So first, I froze colored water in them for Sweet E to explore!


They were beautiful!


I placed them into a tub of warm water, so I didn't freeze her little hands, and let her play freely!


She loved playing with these!


And watching as the water turned blue and the snowflakes got smaller!


Till they were just about gone.


Then I brought out this fun squeegee tool, and taught her how to fill it with water and squirt it out.


This was a great activity for her. Though as you can imagine, after she filled it, she lifted it straight out of the water and squirt it directly at me LOL.


Snowflake Molds - Activity #2 - Frozen Yogurt Snowflakes
We made a yummy treat with our molds next.


I dropped a couple spoonfuls of yogurt into the molds, and let her pour some sprinkles on top.


After a couple hours in the freezer, I popped them right out, and we all had a tasty snack!


Snowflake Molds - Activity #3 - Melting Crayons
Honey Pot and Little M&M were so thrilled to be doing an activity! Recently after reorganizing our craft supplies, I separated out all of the broken crayons. There were a ton! So I set the big kids to work, taking the papers off of them.


Then we broke them up, and separated them by color.


They each were allowed to fill an entire tray as they wished.


Then I baked them in a 200* oven for about 20 minutes, and left them out to re-solidify. Placing them in the freezer sped up the process! The final result was these beautiful snowflake crayons!


They are nice and thick, easy to grab, and color wonderfully.


Here's Honey Pot trying hers out:


And Little M&M sharing his with Sweet E:
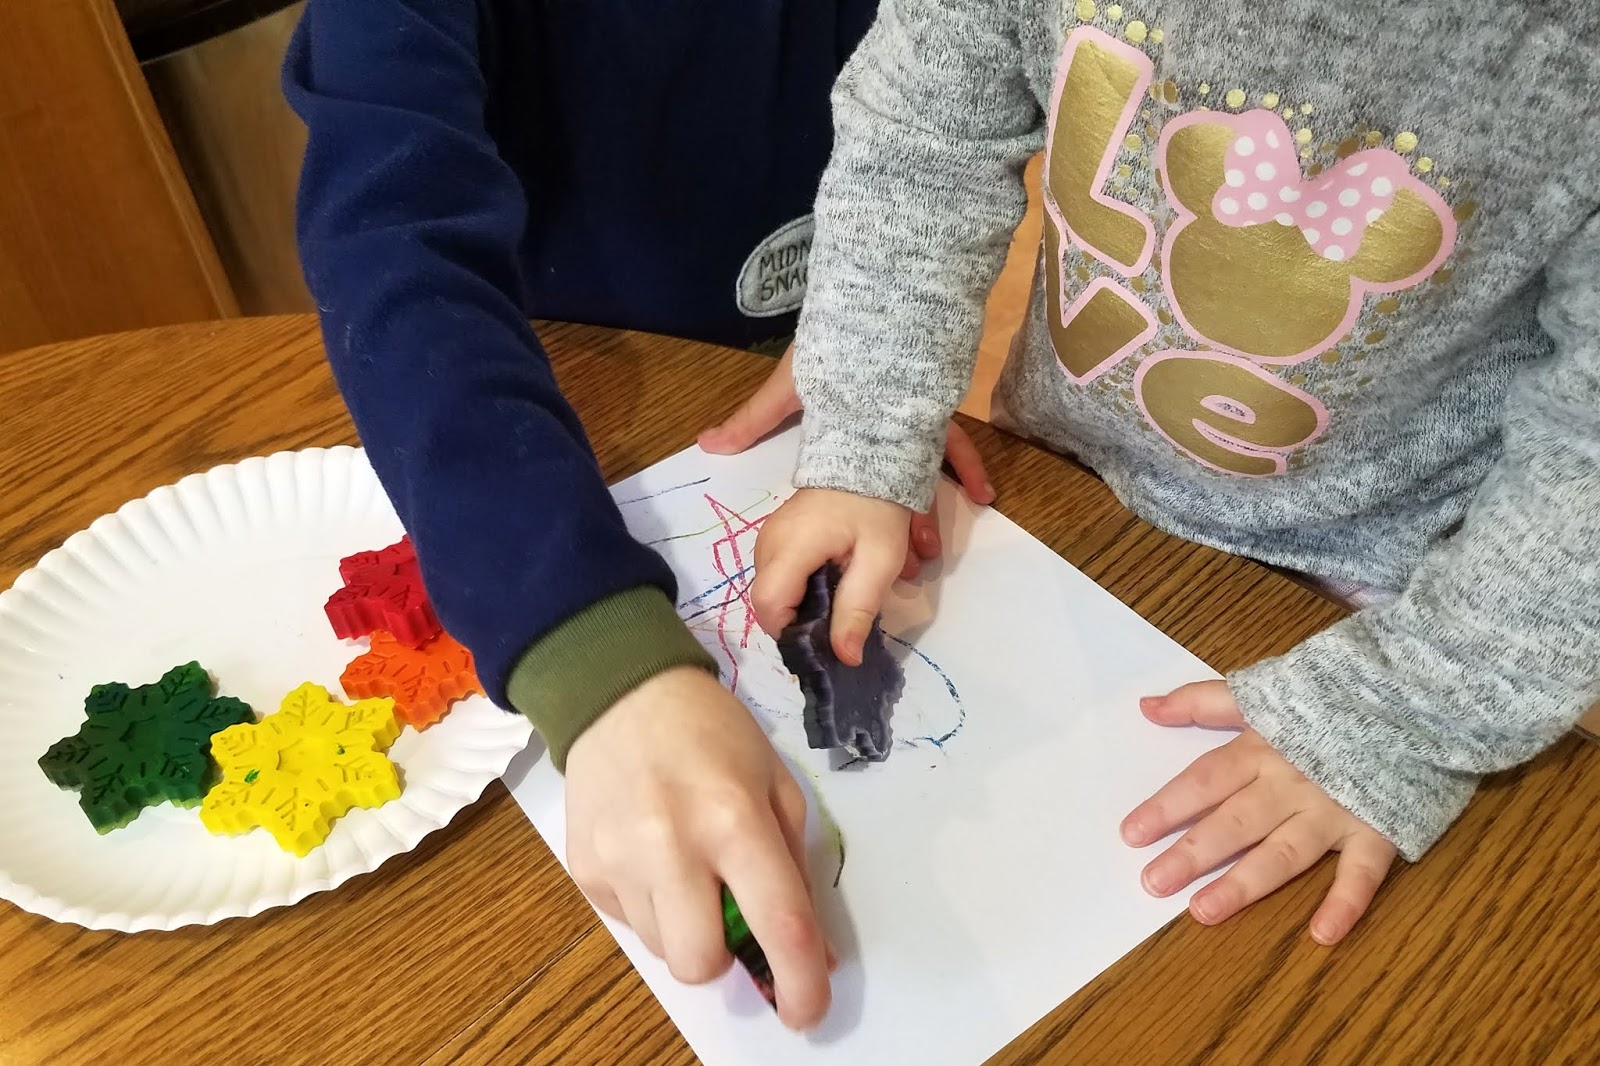

Both big kids were so happy with this activity, and can't wait to bring them to school to show their friends.

Snow Play!
Finally, on the last day of our snow theme, we got a little dusting of snow. We took advantage of it and played outside for nearly an hour! We did plenty of exploring, playing...


and even shoveling!

Saturday, December 29, 2018

Christmas Theme - Toddler

Welcome to Sweet E's first official tot school post! We have enjoyed a few activities together here and there. But now that she is 19 months old I decided to begin intentional learning themes, just as I did with her older siblings. We're starting slowly, but take a look at what we did throughout the month of December:

~ ~ ~ ~ ~ ~ ~ ~ ~ ~

Playdough
I made some homemade playdough in red and green during her nap one day. When she woke up I provided a few simple tools and cutters to go along with them.


She was curious! She loved squishing her fingers into them!


I helped her with the cookie cutters, but she enjoyed poking around with the tools all by herself. 


I later handed these doughs over to Honey Pot and Little M&M, along with a plethora of other tools and small parts for imaginative play, and they had a blast!

Magnet Play
For her next activity, I provided her with jingle bells, a magnetic wand and MagnaTiles. I showed her how the jingle bells can stay on the MagnaTile "trees" and invited her to add some more. 


She loved how they stuck on there!


So she added lots more! Awesome fine motor action at work!


Then she decided to play with the cup of jingle bells. What a fun sound it makes when I shake it!


This of course led to a mess (which was fun to make) so I showed her how to use the magnetic wand to clean them up. 


As an invitation to the older kids, I challenged them to use our entire MagnaTile collection to build a larger tree, and decorate it with several more magnetic bells. They rose to the challenge and made one as high as the ceiling! It was a great way to offer this simple toddler activity to the big kids in a new and exciting way.

Christmas Coloring Pages
A Dollar Tree coloring book. Pretty self-explanatory, but still a must in our theme because Sweet E loves scribbling with markers!


Paint Play
This was Sweet E's first time using paints. She received Little M&M's old smock, which has held up great over the years. I provided her with a squirt of paint in red and green, as well as paintbrushes and thick paper.


After trying to use the brushes, she decided to use her fingers instead. I'll allow it! Look at how fun it is!


I wanted to try a footprint craft while we had the paints out. So I painted her foot brown, and we attempted a reindeer. This was her first time using glue as well, and she really loved it. We'll have to work this into future themes soon!


The finished craft:


Ball Pit Laundry Basket
We did this activity last Christmas as well, and had to do it again while she still fits in there. She just loves climbing in and out of it!


Puzzle Pieces + Sensory Bin
A Dollar Tree blend of dry beans! She found this in my craft closet from when Little M&M used to play with it, so I pulled it out for today's activity. This was perhaps her favorite yet! I hid the puzzle pieces inside the bin, and she had to dig them out and put them where they belong.


She loved it so much, we did this twice in a row.


Then I extended the activity by adding some scoopers and a small container.


I was so surprised at how ready she was for this scoop-and-pour activity. And even more so at how careful she was. We had minimal mess to clean up when she was done!


And all sensory bins end with the feet going in! How very like her big siblings she is!


Sticker Tree
I came across this activity on Busy Toddler and thought it was just perfect for Sweet E! I cut a tree out of poster paper, and the two of us colored it in. Then I peeled the border stickers away from the sheet, and allowed Sweet E to peel her own sticker "ornaments" to place onto the tree. She quickly got the hang of it!


She did this so independently, from start to finish! We talked about colors as she stuck them on. She went through the whole sheet of dot stickers, then later looked for more!


So easy, and so much fun! Dot stickers are the best!


Color Sorting
In the previous activity, as Sweet E was placing stickers onto the tree, I noticed her matching colors. I would say, "Is that a yellow sticker" and she would gesture toward other yellow stickers she placed on the tree already. So I wondered if she was ready to sort colors yet.


She was so willing to try, and did really well with this activity!


Balls + Sensory Bin
I wanted to extend the activity a bit, and use those ball pit balls with some water! Sweet E loved scooping the balls up with her ladle and placing them in the bucket.


Eventually she sunk her hands into there too! She enjoyed splashing around, and experimenting with the ball pit balls. 


Shaving Cream Hidden Colors
Honey Pot and Little M&M were using shaving cream paint in the bathtub, and I wanted Sweet E to enjoy an activity too. So I placed some in a zip-top bag with a couple drops of food coloring, and allowed her to squish it around a bit to reveal the color inside. She kept looking at her hands to see if they were messy (LOL). I think she was disappointed that they weren't!


Dot Marker Coloring Pages
These markers were always a hit with Little M&M, so I bought a brand new set for Sweet E. I found several cute dot marker templates over at The Resourceful Mama, and printed a couple for her to enjoy. 


I helped show her how to use them, by filling in some of the circles myself, and Little M&M decided to help with the border.


All in all, it was a successful first theme for Sweet E. And I am so excited to continue our activities together!