Showing posts with label mermaid. Show all posts

Sunday, May 24, 2020

M is for Mermaid!

It's M week! I was all set to do M is for Monster, and even planned out a week of fun activities. But Sweet E has been so in love with her Little Mermaid book and movie, that I decided to change it at the last minute. Keep scrolling to see what I came up with, or click on the links below to revisit similar themes from her big brother's and big sister's Tot School days!


The Letter M - 2013

Introducing the Letter M
As always we began our letter of the week by creating it in various ways. This week: tracing, stamping, poking, building with playdoh, and covering with stickers.


She loves playdoh, and was happy to roll out the snakes to build the M.


So pleased with her work!


Mermaid Craft
I found this fun idea and free printable at The Best Ideas for Kids. First Sweet E and I colored in our mermaids. Well, I colored mine; she drew a couple squiggles onto it and moved on.


Then we squeezed some glue onto the paper, and pressed lots of sequins onto it!


And then she squeezed more glue onto it, and dumped a lot more sequins onto it!


Here is mine... the look we were going for...


And here is her's! 😂 💗


Seashell Dig - Alphabet Review
For this activity I wrote the letters we'd covered so far onto the backs of seashells. Then I buried them in sand, and invited her to find them. I decided to keep them contained in a bucket, so that they wouldn't get lost forever in her sandbox.
  

She got so excited to find one! 


I had written the names of the letters on a piece of paper, and placed it beside the bucket for her to match them up. I also had some mermaid stickers on there, that I found in our sticker drawer, to keep it in theme. 


I would ask Sweet E what letter was on the seashell. She'd tell me, and then place it onto the paper on top of the matching letter.


She loved this!


She did this activity a couple times in a row. And her big brother even played it with her again later!


Mermaid Ice Excavation
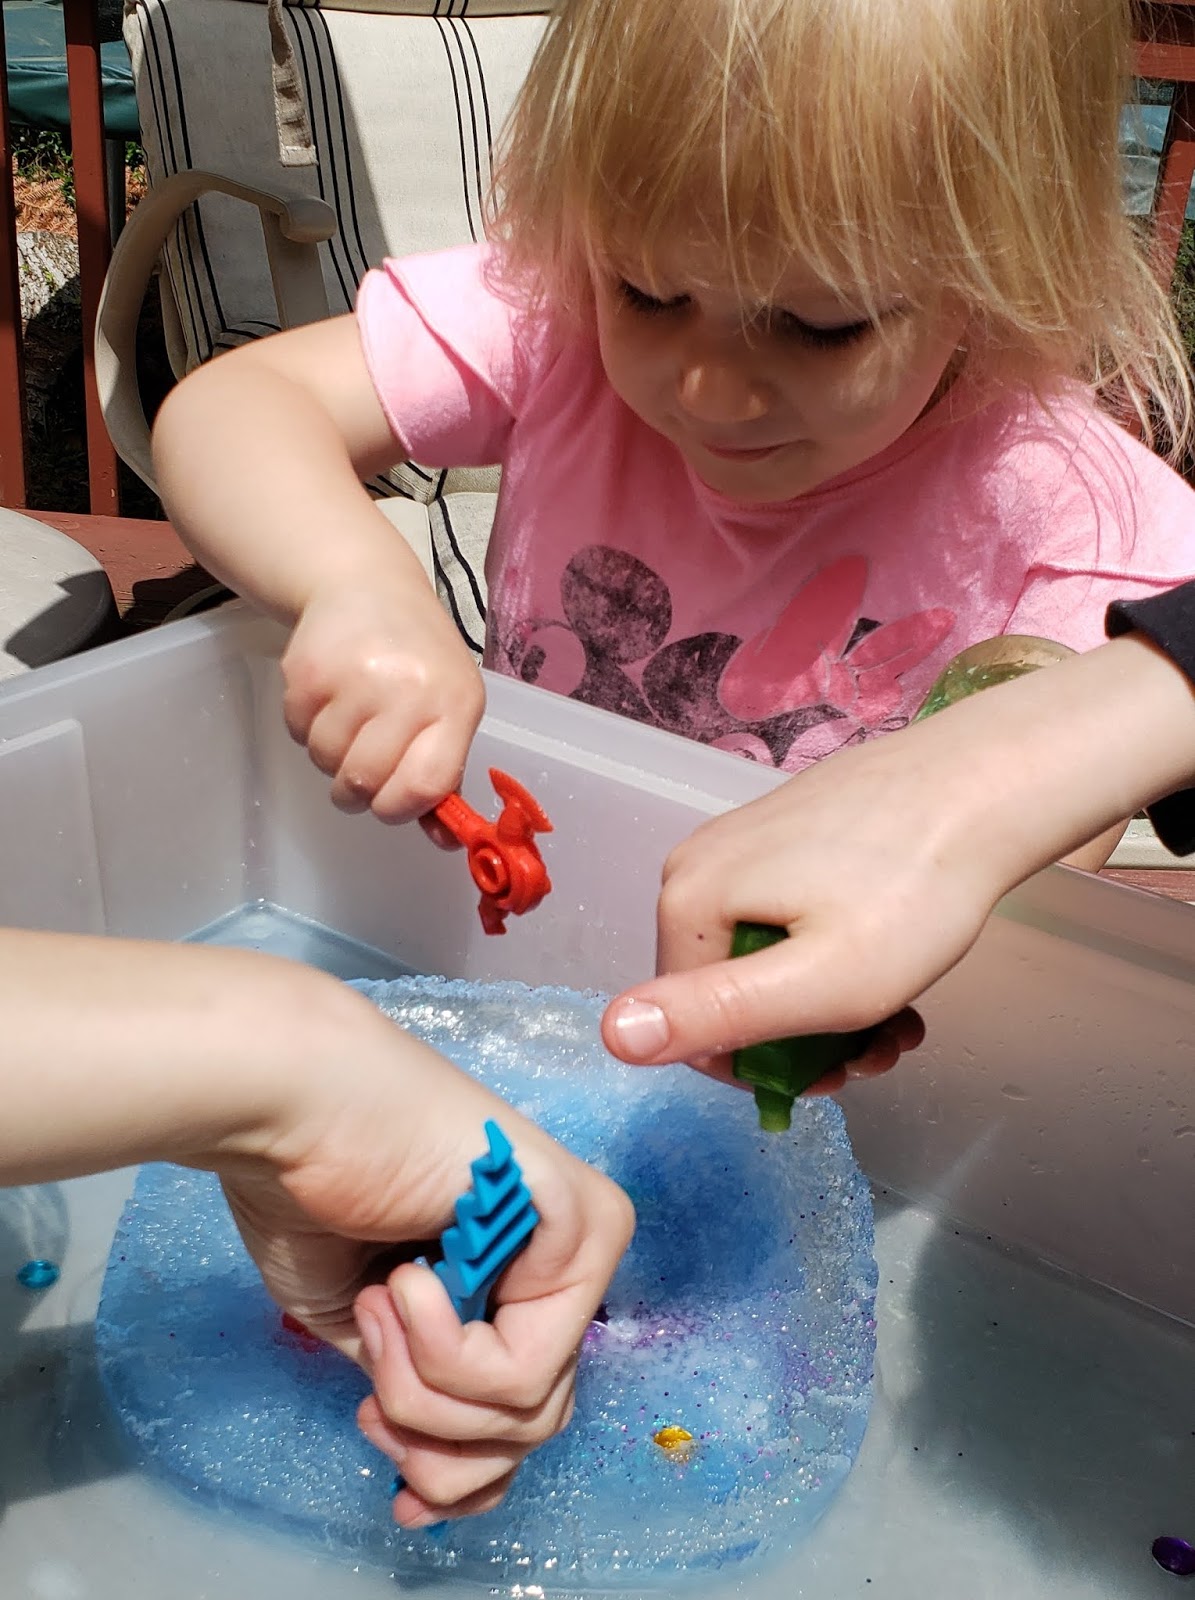
We've done this activity a number of times over the years. It's always fun! The night before the warmest day of our week, I froze her two mermaid toys in a dish. I tinted the water, and tossed in a few pretty gems and glitter too. The next afternoon we were ready to play!


I supplied her with some salt, warm water (in a spray bottle and in a cup with pipettes), and some tools. At first I could only find one tool, but then I ran to our playdoh supplies and brought out lots more! She loved spooning salt over the top.


And rescuing the gems as they became free.


She tried spraying it with warm water, while big brother and sister used the pipettes.


Actually, Honey Pot and Little M&M were all over this activity. I decided immediately that I would do this again soon, and in 3 separate dishes, so they wouldn't get in each other's way!


Those playdoh tools really helped!


The big kids have taken over!


Sweet E was able to rescue the second mermaid by herself!


Counting Bubbles - One-to-One Correspondence
Okay, excuse my drawing skills (or lack thereof LOL). For this activity I drew some bubbles on the chalkboard wall, in clusters from 1-10.


Sweet E needed to count the bubbles, find the number at the bottom, and place the post-it note on top of it.


While she can count to ten (and higher), she sometimes trips up while actually counting things. So this one-to-one correspondence activity was great practice for her!


She enjoyed this so much she actually did it three times in a row, and then again later. I guess my drawing didn't frighten her too much! 😆

Monday, April 29, 2013

Little Mermaid Birthday Party!

Honey Pot is turning three this week! Although I would have sworn that she would choose Sofia the First as her party theme, she shocked us all and chose Ariel, The Little Mermaid, despite only seeing it once very long ago. It's definitely a favorite for all of us, so I went with it.

Invitations
I had to quickly send out invitations before I had chosen my party colors. So I just chose a simple design (with a pretty bokah background) and created it in Photoshop Elements. I sent them digitally again, to save on printing and stamps!


Outfits
I found an adorable Ariel dress on Etsy, and it arrived just in time for the party. It comes from this lovely shop. I'm in love with it, and I know Honey Pot is too. She will wear it all spring and summer, I'm sure!


We also bought a Flounder shirt for Little M&M from Etsy. However, it didn't arrive on time. I'll post pics below once it does and we've gotten a proper photo shoot.

* * UPDATE * *

Here are some pics from the photo shoot I did of the kids on Honey Pot's actual birthday. Little M&M's shirt came customized with his name under it, so please excuse the poor editing to remove it!


Photo Display
You always need one or more photos to celebrate the birthday kid! I went with something a little dramatic this year. I had seen this image from Martha Stewart and decided to make a giant number too! Er, three! LOL. Photos range from birth to present day...some of Honey Pots most memorable moments. I just loved reminiscing!


Wreath
Remember the Elmo wreath I made for Honey Pot's second birthday party? I cut the red yarn off and made a simple blue wreath for the Little Mermaid party. I used stickers. Just a little something to hang on the front door so people knew where the party was!


Beverage Station - Ursula's Cauldron
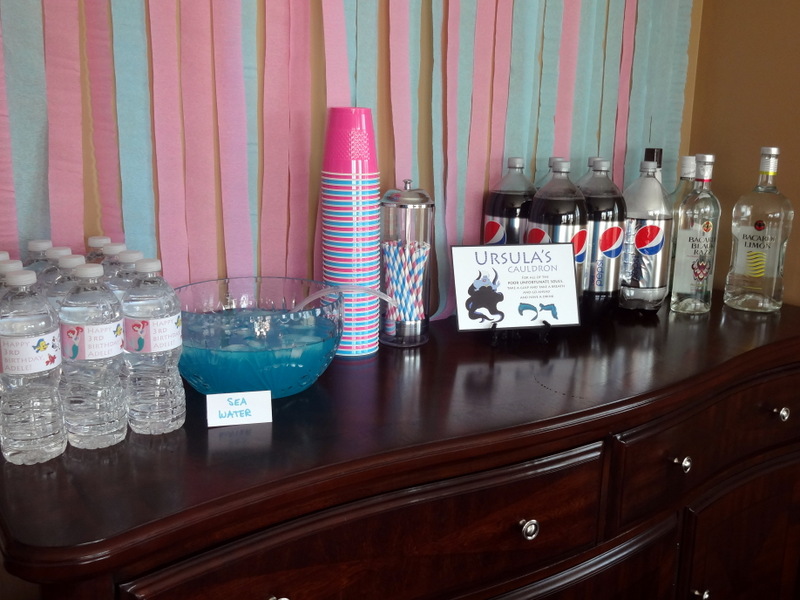
I made this sign and matted it to display on the beverage bar. Partial quote from the movie! Also please note the beautiful straws that I finally splurged on. These particular ones came from Amazon.com. They were a little too large for the cups I bought from Party City, so we cut them with a super sharp Shun knife. The display stand came in a pack of three for $1 at the Dollar Tree. Love these.


My husband created the streamer backdrop at the bar. They go all the way to the ceiling. Love how it came out! Also, I found the idea for the blue punch bowl at Apartment Therapy. All week we were making fishy ice cubes and then I didn't even get a good picture of them in the punch! Gah! See the link above to see what it looked like though. Cute fish!


And in addition to the "Sea Water" punch and the variety of rums, I wanted a few water bottles as a beverage option too. So I made some quick custom labels in Photoshop Elements for those.


Party Games for the Adults
Since we just moved to a new town, we had just a family party this year. And there were far more adults than kids. So I tried to gear some of the fun toward the adults this time. First, I had a shell guessing game. I called it Scuttle's Seashell Collection. The guests had to guess how many seashells were in the jar. Before the end of the party, I looked through the answers and revealed the correct number. The winner got a prize!


The second game offered was what I called Ariel's Pop Quiz. I know many of the guests are fans of the movie, and so we had some fun trivia questions for them to answer. It was twenty questions. It was fun to watch everyone so hard at work throughout the party. And I could see how much fun they all had with it too, trying to recall some of the little details from the movie. Toward the end of the party, everyone swapped pages and graded them. The person who had the most correct answers won a prize.


Here is what the winner of each game won: a gift card to Amazon.com. They let you upload your own image too!


Food Table
The party began at 2PM. We didn't do dinner until 6 PM or so (we had a BBQ: cheeseburgers and hot dogs, potato salad and BBQ chips) so we offered a variety of munchies until then. Here is my Party City stash of matching table settings.


Most of the following clever food ideas came from a party at a blog called Bachmanville, with the exception of the shark teeth which came from Delia Creates and the blue seafoam dip which came from Allee Willis. Party planning is a hobby of mine. So as you can see, I do my research!


Flounder's Fish Craft
I offered one fun craft for the kids to do during the party. I called it Flounder's Fish Craft. I made up this sign and hung it near the outdoor kid picnic table, which held all the supplies.


Here are some of the kids hard at work! First they painted a sheet of bubble wrap, then they chose a fish cutout and pressed it against the bubble wrap. Lift and voila! They had created colorful scaled fish! Once they dried, we glued on a googly eye (or 2 or 4, as some of the kids wanted to do!) and hung it on our seaweed wall nearby.


Here is the final product. I am SO in love with how this craft came out!


Making their best fish faces!


Pretending to be sharks!


And finally up from his nap to join the party, Little M&M!


Sebastian's Sand Search
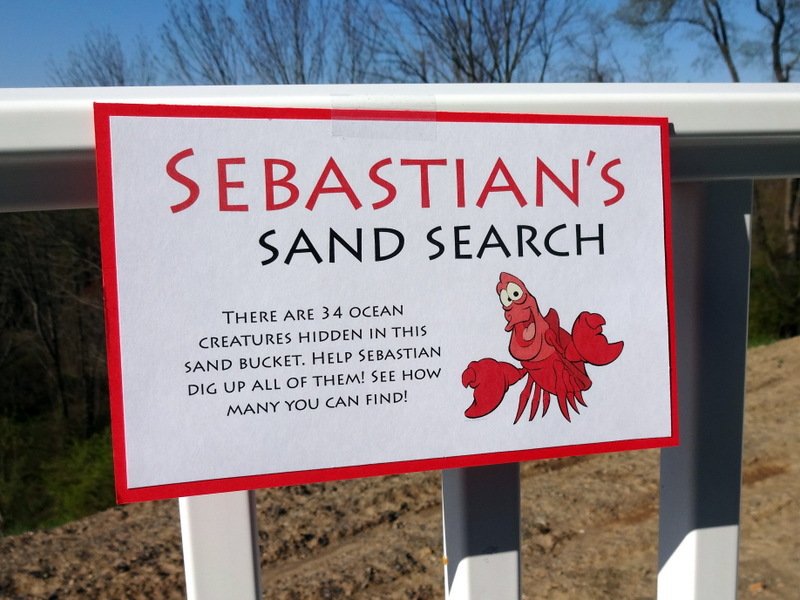
Also from Bachmanville came the idea for a sand hunt. It is called Sebastian's Sand Search. Here is the sign I made.


We filled a bucket with play sand (about $3.50 a bag from Lowes!). And we hid 34 sea creature figures inside (purchased from Amazon.com). This game was a huge hit! And thank goodness we had such beautiful weather.


All the kids (and even some adults!) got really into this.


A few were hard to find; and actually, there are still five creatures missing in there somewhere!


Desserts
I made some cupcakes for dessert. It was just a plain white cake, but I divided the batter into three sections and tinted them in gradient shades of blue. I don't have a picture of them though! D'oh! Also, I created the cupcake toppers in Photoshop Elements.


Honey Pot enjoyed the frosting. Only.


Sand dollar cookies made simply from a Pillsbury Sugar Cookie dough and slivered almonds. The idea came from a blog called Completely Coastal. These were yummy! Wish I had made more, and displayed them on crushed graham cracker crumbs. Would have been a marvelous display!


Cookie Pops! I make these at every party and everyone always raves about them. Just swap the party colors as needed. Though I have made them in the shape of Elmo (see that here) and Minnie Mouse. Displayed on a cake pop stand that I treated myself to last year from Cake Pops Stands on Etsy.


Goody Bags
I love putting together goody bags! All items must be relevant in some way to the party. I included a custom Go Fish game that I made with Little Mermaid characters, a mermaid shimmer box of crayons (the boy guests received and ocean one), bubbles with a custom label and a bag of Swedish Fish. I almost made homemade crayons using my ice cube tray (a craft I have been itching to do with Honey Pot) but apparently it destroys the tray and I wasn't willing to part with it yet.


Close-up of the bubble wrappers.


Close-up of the Go Fish cards. There were four of each of course.


Thanks for checking out our Little Mermaid party!! We had a blast!


* * * * * * * * * * * * * * * * * * * * * * * * * * * * * * * * * * * * * *